Transcription
Did you know that one of these balloons is owned by a secret society of the five wealthiest people on the planet? Interesting.
Well, that may not actually be true, but we don’t want to take our chances. So in this video, we’re going to look at how we can firstly track that balloon and then blur it out using DaVinci Resolve. Now we’ll look at that in the second part of the video.
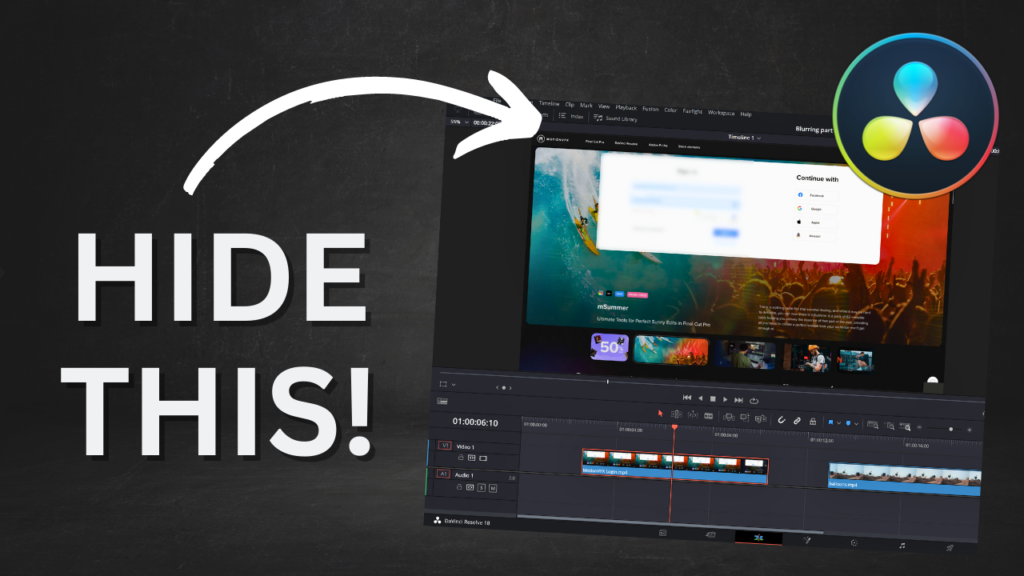
In the first part of the video, we want to look at taking the time to blur some content that includes secret information like a password or a software key or something like that that you might want to blur out. So let’s jump over into Resolve and take a look. So we want to focus on our first clip. Now we’ve got a login page here to the motion VFX site.
So if we play that, you can see that we’re entering in the login email address and the login password. Now the password is obscured, but giving people even the first part of the login is not recommended. So we want to look at how to blur that. To do that, we want to jump up. We want to select our clip and then jump over into the color page and we want to use power windows to isolate the part of the screen that we want to blur. And then we can use the effects to blur.
So if we click on this fourth icon along in the middle toolbar and we can see we’ve got a square circle line and curve type power windows. So if we just click on our linear, then we can see that our linear gets added to the page. So we can now drag this up to the spot that we want. Now these guides, you’ll see there’s a couple of different lines here. There’s three lines. One is the central line. The other is the amount of easing that we have on any effects that we put on. So we want to try and sort of bring this in a little bit so we don’t have a very soft edge. And then we can move it up into the top left hand corner and then we can grab our corners and effectively move them to the spot that we want to cover with our blur. There we go.
So now we’ve got our power window in place. We can just move along to the next section on the toolbar, which is the blur. And we can click on that and then all we’ve got to do is grab one of these radius sliders and push it up. And as you can see, that section of the screen that we selected with our power window is now blurred out. So that’s how to do it with just a simple power window. Now with our second clip, we want to be a little bit more specific.
We want to actually track an element. So if we go to the start of our clip and we want to track this red and white balloon. So again, we’ll jump back to the color page and we’ll again use a power window, but we’ll use the circular one this time. And we can just make this a little bit smaller, bring in our edges and we’ll hover it over our balloon, close it in a little bit.
Now what we want to do is we want to actually track this balloon through the clip. So to do that, we can click on the tracker item in the toolbar and we can just press this track forward and reverse button. Now what that’ll do, as you can see, it’s actually tracking the movement of the balloon through the clip. So it’s making a note of where it’s moving in space. And it only takes a few seconds just to track through that entire clip. So once it’s done, again, we can come back up to our blur toolbar icon and we can push up our slider to blur that part of the image.
Now the other way to do that, if we reset this blur is we can go into our effects tab and we can actually apply a specific effect to our node. So we can grab our Gaussian blur, drag it over top of our node, and then we can control the level of the blur from there. So that’s just two different options that you can use to blur an item while it’s after it’s been tracked. So if we jump back to the edit page, we can now play our clip and you can see that the balloon is now all blurred out. Thank you.